


Photo by Glenn Carstens-Peters on Unsplash
How to Create Your First Swift Package Manager (SPM) and Use it


Greetings everyone, today I will talk about creating our own SPM package and how to use it.
While working on a project, have you ever needed extensions or utilities from a project you worked on before? If your answer is yes and you went to the previous project and copied and pasted the codes, SPM is exactly what will save you from this trouble.
So let’s start;
What is the SPM ?
At its core, the Swift Package Manager is a command-line tool that facilitates the management of Swift code dependencies. Think of it as your trusty assistant for handling all the nitty-gritty details involved in integrating third-party libraries and frameworks into your Swift projects.
How does it work?
The magic of SPM lies in its simplicity and efficiency. We just need to define the package’s metadata and dependencies in a single manifest file called Package.swift. This file serves as the blueprint for your Swift package, containing essential information such as the package name, version, supported platforms, and dependencies.
With the Package.swift file in hand, developers can effortlessly declare the libraries and packages their project relies on. SPM then takes care of the heavy lifting, automatically fetching and managing these dependencies, so you can focus on building awesome apps without worrying about version mismatches or compatibility issues.
Advantages
Seamless Integration: SPM seamlessly integrates with Xcode, Apple’s flagship IDE for macOS and iOS development. This tight integration means you can manage your Swift packages directly within Xcode, streamlining your workflow and eliminating the need for third-party dependency managers.
Dependency Management Made Easy: Gone are the days of manually downloading and configuring dependencies. With SPM, adding a new library to your project is as simple as updating your
Package.swiftfile and letting SPM do the rest. Say goodbye to dependency hell and hello to hassle-free package management.Enhanced Collaboration: SPM makes sharing Swift code a breeze. Whether you’re collaborating with teammates or contributing to open-source projects, SPM simplifies the process of distributing and consuming Swift packages. With just a few commands, you can share your code with the world and leverage the collective wisdom of the Swift community.
Let’s create our first SPM
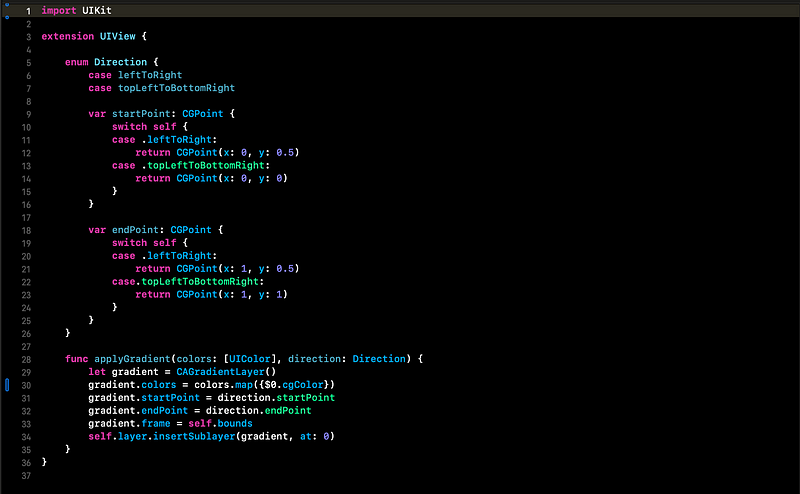
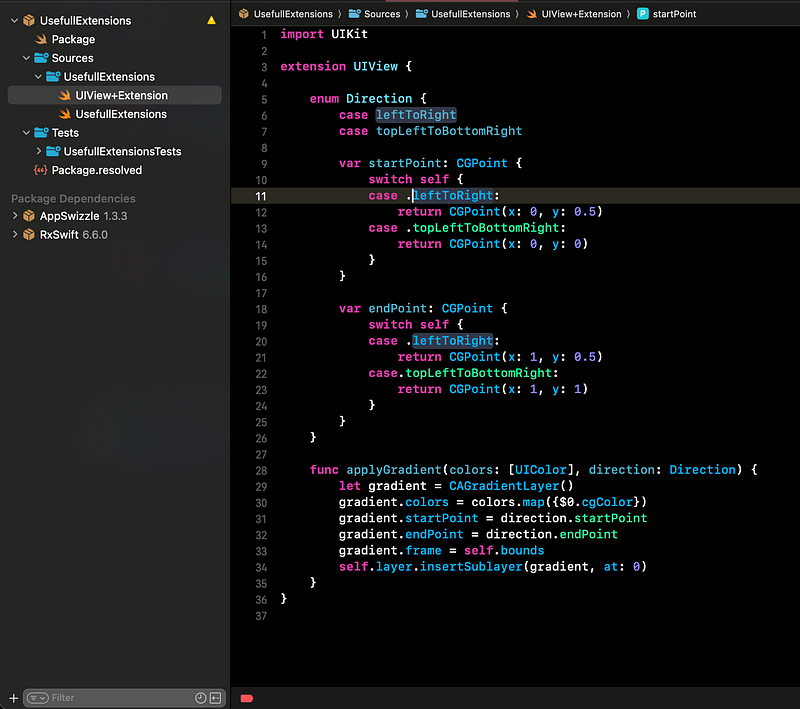
I have a project and it has a UIView extension method. This method is used to add gradient to the view. If I want to use this feature in another project, I can copy and paste this code 🥲 But this would not be a sustainable solution. If I did this code copying job for a feature and used it in different projects. Later, when an update to this feature was required, would I need to update all projects one by one? Let’s create our SPM to avoid dealing with this.
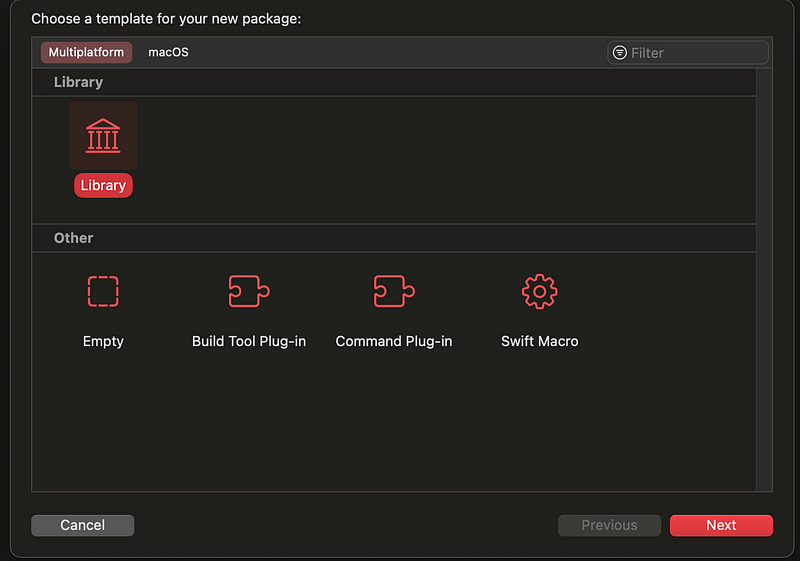
Just click to File -> New -> Package and select library

Select the location you want to save and create it.
Okey this is different from the regular Xcode project.
Here we first see Package.swift.
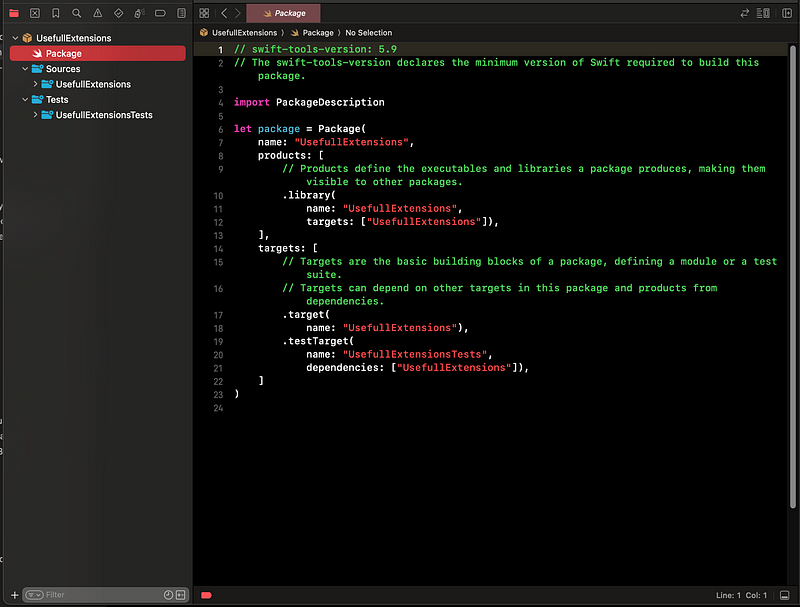
This is the basic version for this package. Also we can have dependencies section if our package needs to another package like RxSwift maybe or some networking, caching library. Like this;
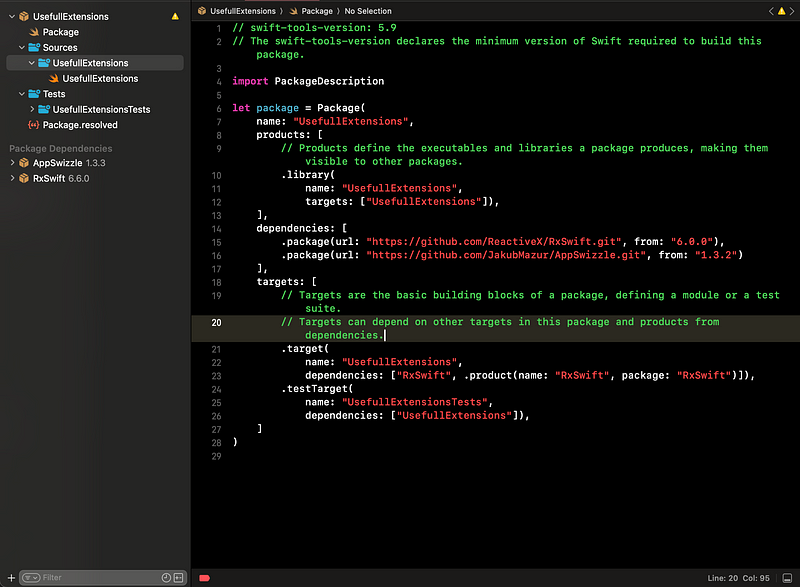
As you can see I added two field. First, line 14 dependencies. I add the url of 2 repo and you can see the left side XCode downloaded two package when I hit command+B.
Another one, I add dependency to my target in line 21.
Okey now lets add our extension to package;
Just drag and drop the swift file to your package
Okey now press command+b and push the package to your Github.
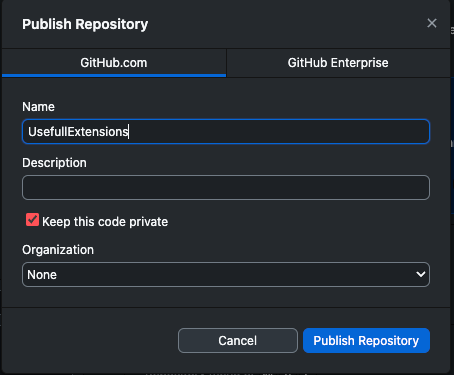
I usually use Github desktop. You can push your code to Github in any way. If you want everyone to access and use your package, disable private. For now, I will proceed as public.
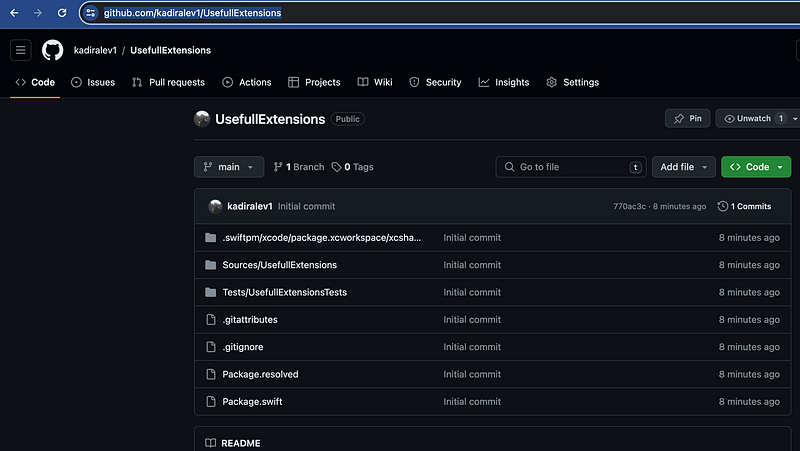
OK, now let’s upload our first SPM package to Github. Okay, now let’s use this in an example project.
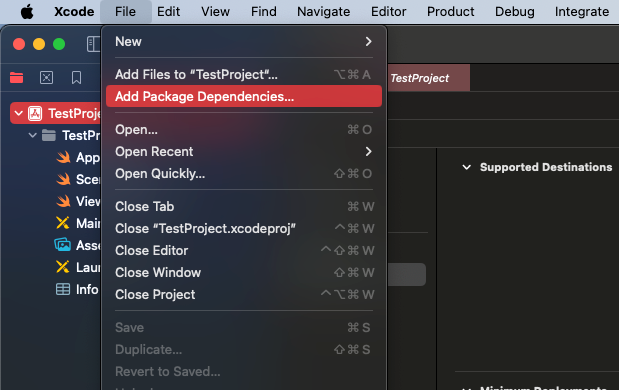
In your existing or new project, click File -> Add package dependency
Now go to the project repository where we pushed the package and copy the url.
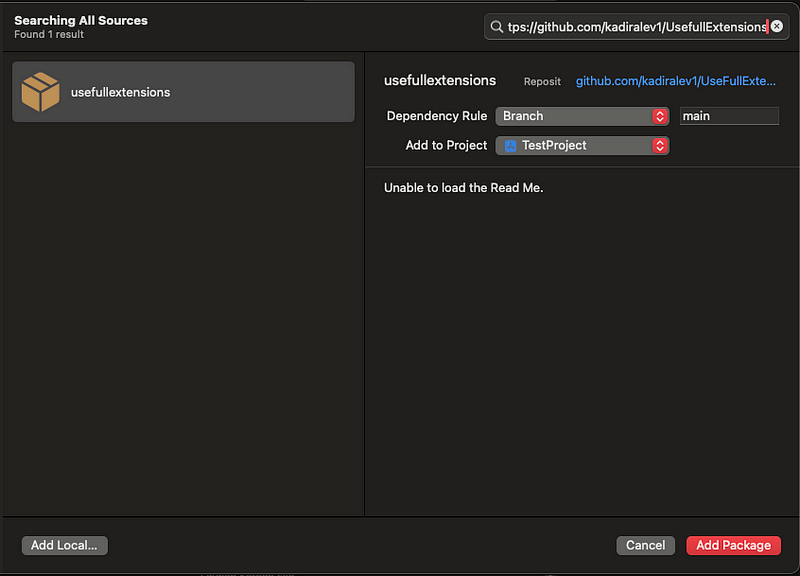
And paste it here. Now you can add package to your project (We did not use the tag for this package but if you want to version controlling you can add tag to your package when push it to your Github).
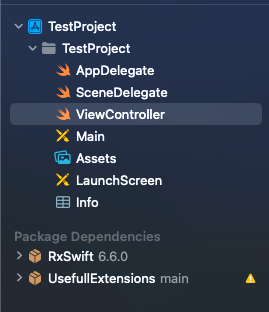
As you can see our package is loaded and also it is loaded the dependency for the target.
Now lets use it;
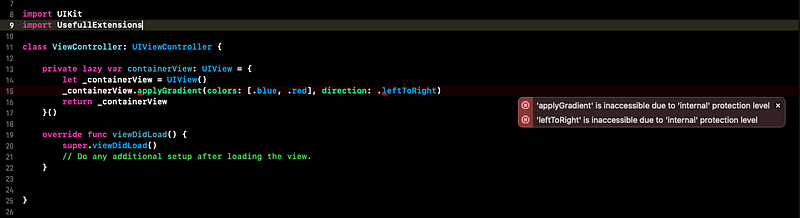
Okey we import the UsefullExtensions and tried to use it. But we missed something. In packages default access level is internal. That means methods or enums etc. is only accessible from the module itself. To allow the use it from outside the module we have to change the access level to public. Lets do it.
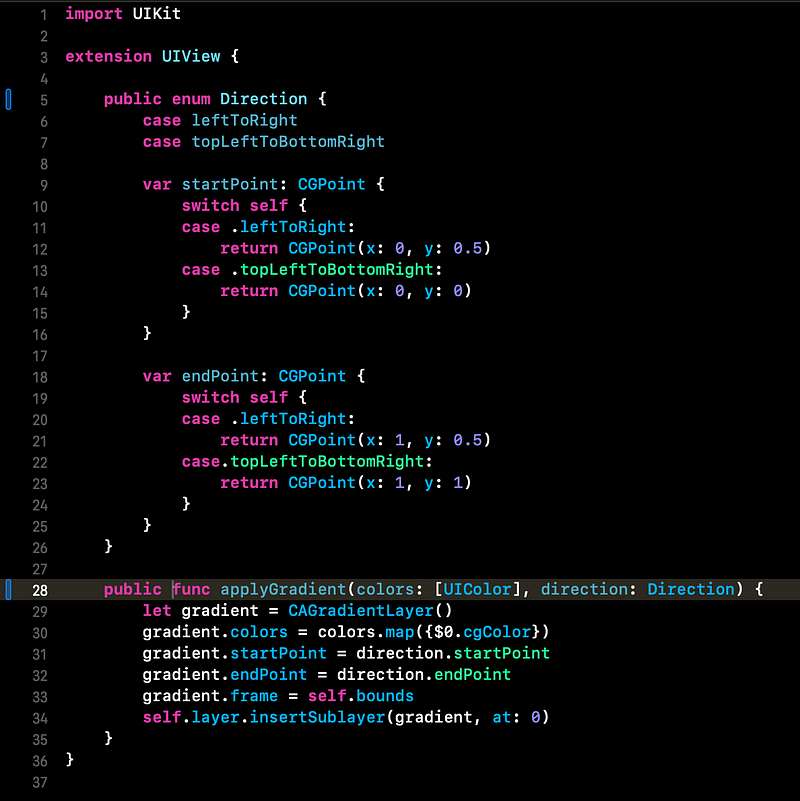
We add public to enum and method. After push your code to github for your package, update the packages for example project.
Click File -> Packages -> Update the latest package versions
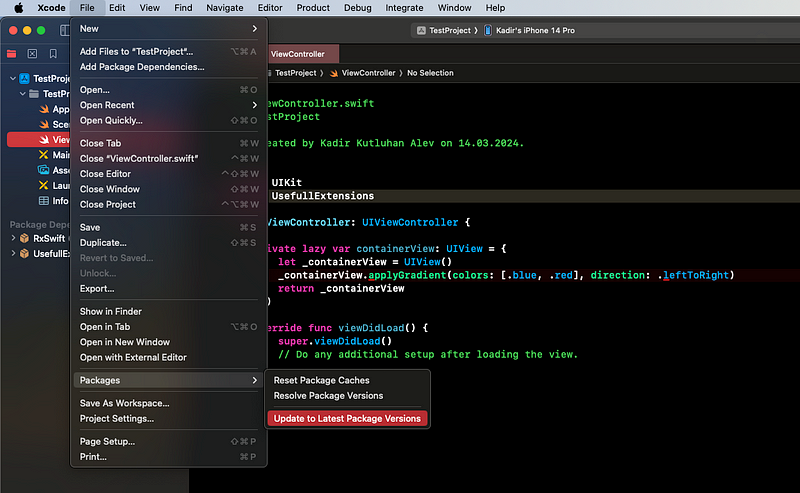
After fetch the last updates from the repository now we can use our methods from project target.
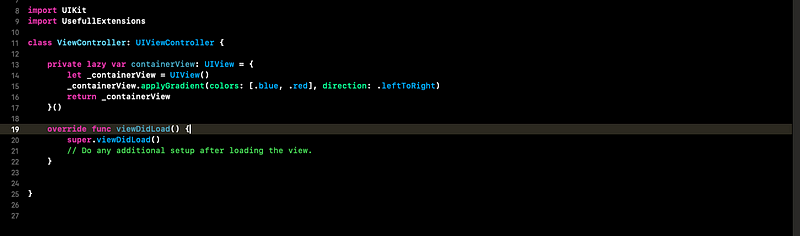
We don’t have any error now 🙌 Congratulations, you have created and used your first Swift Package. Now you don’t have to copy paste your codes for every project.
Thank you for reading and see you in my next article 🚀.